
The Enigma of the Vintage Presto Aluminum Cheese Slicer
In a world brimming with high-tech kitchen gadgets and modern culinary innovations, sometimes it’s the old-fashioned tools that spark the most curiosity. One such relic is the Vintage Presto Aluminum Cheese Slicer, a piece that has puzzled many with its timeless charm and intriguing functionality. This peculiar yet elegant tool hails from the mid-20th century—a time when kitchen gadgets were built with both form and function in mind. Yet, despite its vintage allure, it has left many scratching their heads, wondering about its true essence and purpose.
A Glimpse into the Past
Imagine stepping into a 1940s or 1950s kitchen: the air is filled with the aroma of home-cooked meals, and every tool and appliance has its place, crafted with a mix of practicality and style. The Vintage Presto Aluminum Cheese Slicer would have been a proud addition to this kitchen, embodying an era when kitchen gadgets were designed to last and look good while doing it.
I remember finding a similar cheese slicer tucked away in my grandmother’s kitchen drawer, its polished aluminum surface glinting softly in the light. The slicer was an enigma—old, yet perfectly functional, with a design that seemed both antiquated and ahead of its time. It was a reminder of simpler days, when the kitchen was the heart of the home, and each tool had its story.
Ingredients
While this cheese slicer doesn’t come with a recipe per se, it does require a specific “ingredient” to showcase its magic:
A block of cheese: Choose a block of your favorite cheese. Hard cheeses such as cheddar, Swiss, or Gouda work best for optimal slicing.
Instructions
1. Preparation
Select Your Cheese: Begin by choosing a block of cheese. The slicer is designed to handle firm cheeses well, so opt for something like cheddar, Swiss, or Gruyère. The cheese should be cold from the refrigerator, as this will help it maintain its shape and slice more easily.
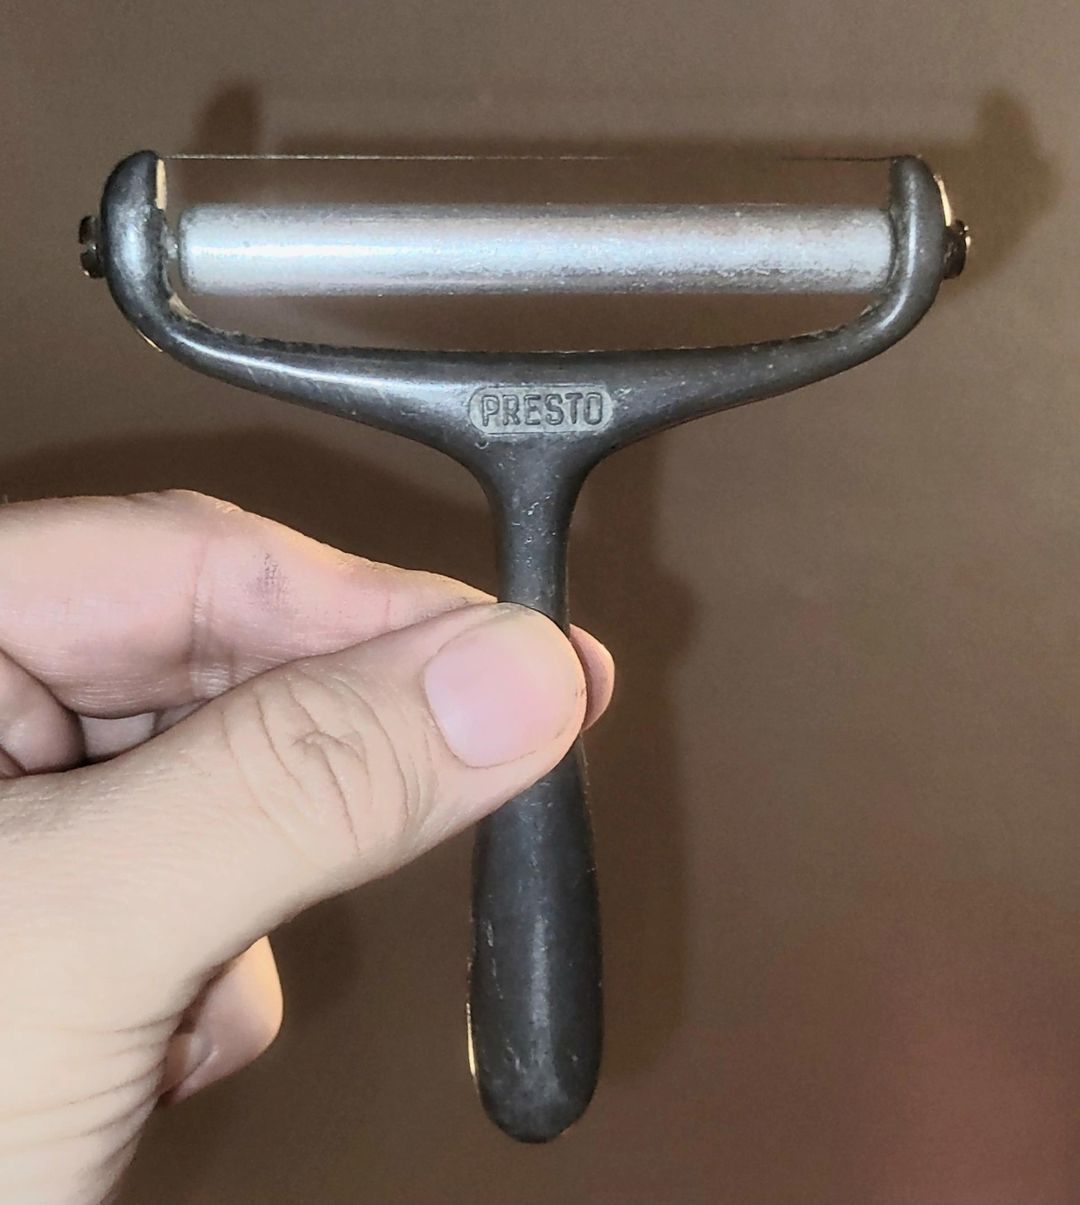
Inspect the Slicer: Take a moment to admire the craftsmanship of the Presto Aluminum Cheese Slicer. Note its vintage design—typically featuring a sturdy aluminum base with a thin, sharp wire that cuts through cheese with ease. Check for any signs of wear or damage, although these slicers are generally quite durable.
2. Slicing the Cheese
Position the Cheese: Place the block of cheese on a cutting board. Position it so that it fits comfortably within the slicer’s width. Ensure the cutting board is stable and won’t slip during slicing.
Adjust the Slicer: If your slicer features an adjustable wire or blade mechanism, set it to your desired thickness. For most cheese slicing tasks, a medium thickness is ideal, but you can adjust according to your preference.
Begin Slicing: Hold the handle of the slicer firmly and position the wire against the cheese. Gently pull the slicer towards you, allowing the wire to cut through the cheese. The aluminum construction of the slicer ensures a smooth glide, making it easy to achieve even slices.
Continue Slicing: Move the slicer along the cheese, making sure to keep a steady hand for uniform slices. The design of the Presto slicer allows for effortless cutting, reducing the need for excessive pressure.
Remove the Slices: Once you have sliced the desired amount of cheese, carefully lift the slices off the cutting board. You can use them immediately for sandwiches, cheese platters, or recipes requiring pre-sliced cheese.
3. Cleaning and Maintenance
Clean the Slicer: After use, rinse the aluminum slicer under warm water to remove any cheese residue. Avoid using abrasive scrubbers that might scratch the surface. A gentle dish soap and a soft cloth or sponge are sufficient for cleaning.
Dry and Store: Dry the slicer thoroughly with a clean towel before storing it. Ensure it is completely dry to prevent any potential corrosion. Store the slicer in a dry, cool place, ideally in a kitchen drawer or on a utensil rack.
👇 To continue reading, scroll down and click Next 👇
ADVERTISEMENT
