
Fight germs and mineral buildup that almost always escape you on chore day with these simple steps.
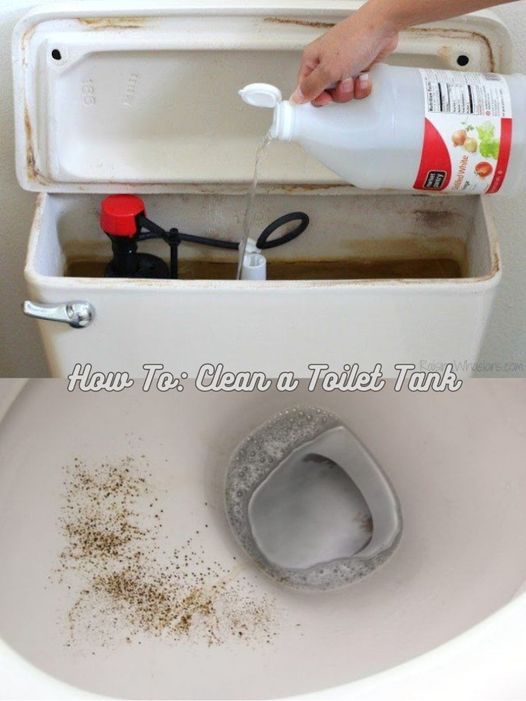
If the last time you shined the bathroom, you couldn’t completely mask a foul odor or had to work hard to remove brown rust stains from the rim of the toilet bowl, your work may not be done. Don’t beat yourself up for missing a spot, because this one is often overlooked: the toilet tank. Its lid keeps dirt, bacterial contamination and mineral buildup out of sight until you need to lift it to reach the tank and stop manual toilet operation or evaluate parts for another repair. These poor conditions can also lead to corrosion of the metal parts of your toilet tank and cause stains on the bowl – the first indication of a problem for most homeowners.
By cleaning your toilet tank regularly – at least twice a year – you can extend the life of your toilet and all its parts, freshen up the smell of your bathroom and save yourself elbow grease the next time you clean the bowl. It’s a win-win situation! So what are you waiting for? Get a task done quickly and keep it fresh by following this guide on how to clean a toilet tank.
HOW TO CLEAN A TOILET TANK
TOOLS & MATERIALS
White vinegar
Rubber gloves
Disinfectant cleaner
Scrub brush with long handle
Sponge
Natural toilet tank cleaner
STEP 1
HOW TO CLEAN A TOILET TANK
TOOLS & MATERIALS
White vinegar
Rubber gloves
Disinfectant cleaner
Scrub brush with long handle
Sponge
Natural toilet tank cleaner
STEP 1
First, empty the tank. To do this, locate the water valve (the “faucet” valve on the wall behind or near the base of the toilet) and close it. Next, lift the tank lid so you can see the water level inside and flush the tank until it is completely empty. Depending on your flow rate, you may need to flush two or three times.
STEP 2
Assess the condition of your tank. If it’s just surface dirt, it’s a simple cleanup that a little brushing should alleviate. Proceed to step 3. If, on the other hand, you see discoloration from mineral deposits and residue accumulating at the bottom of the tank and working its way up the sides, opt for a more aggressive method: vinegar. This natural star is an excellent line of defense against mold, hard water deposits and more. You’ll need enough vinegar to fill the tank to the overflow valve, which can be up to three gallons depending on the size of your tank. (Fortunately, at about $3 a gallon, it’s not that expensive!) Pour in the vinegar and let it sit for 12 hours without flushing. When you’re ready to clean, drain the vinegar. Again, this may take two or three rinses.
👇 To continue reading, scroll down and click Next 👇
ADVERTISEMENT
